Fall-Inspired Drink Coasters
Bring a cozy touch of autumn into your home with these Fall-Inspired Drink Coasters! This easy craft is perfect for both kids and adults — little ones will love getting creative with colors and shapes, while grown-ups can enjoy making something cute, useful, and seasonal. Whether you’re crafting for fun, decorating for fall, or making handmade gifts, these coasters are a quick and family-friendly project that adds a touch of autumn charm to any space.

Materials

You’ll need:
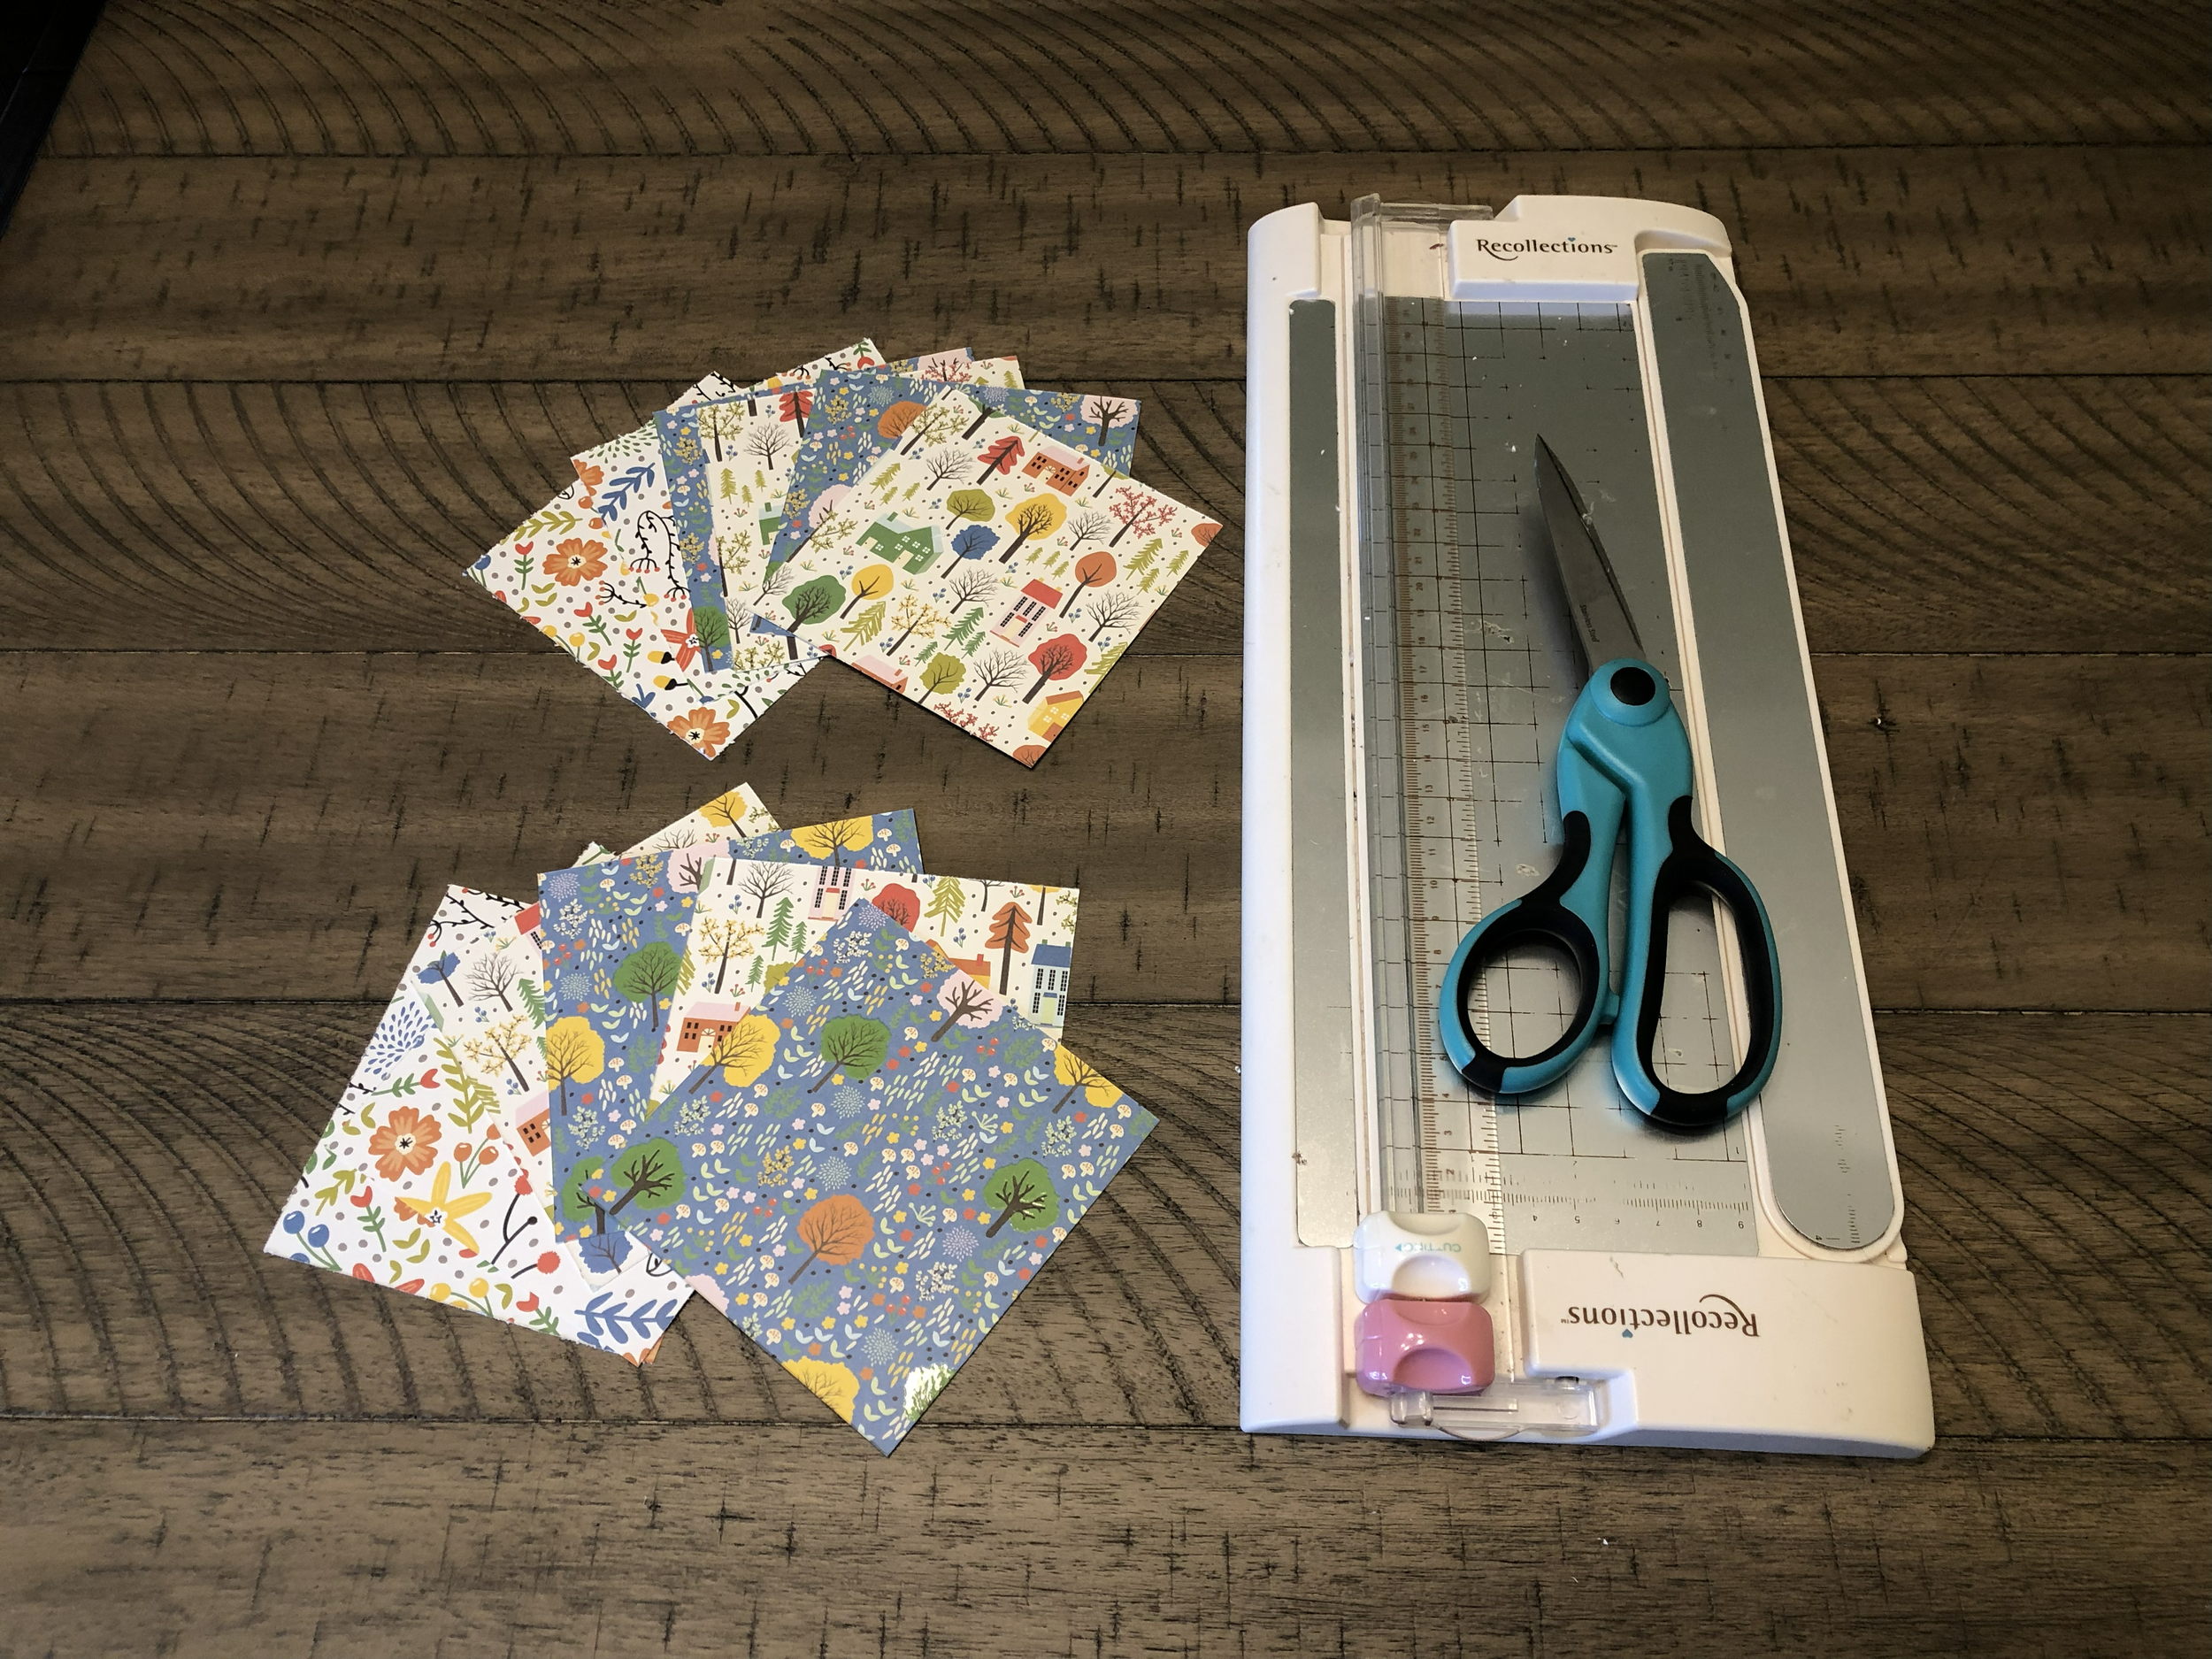
Scrapbook Paper
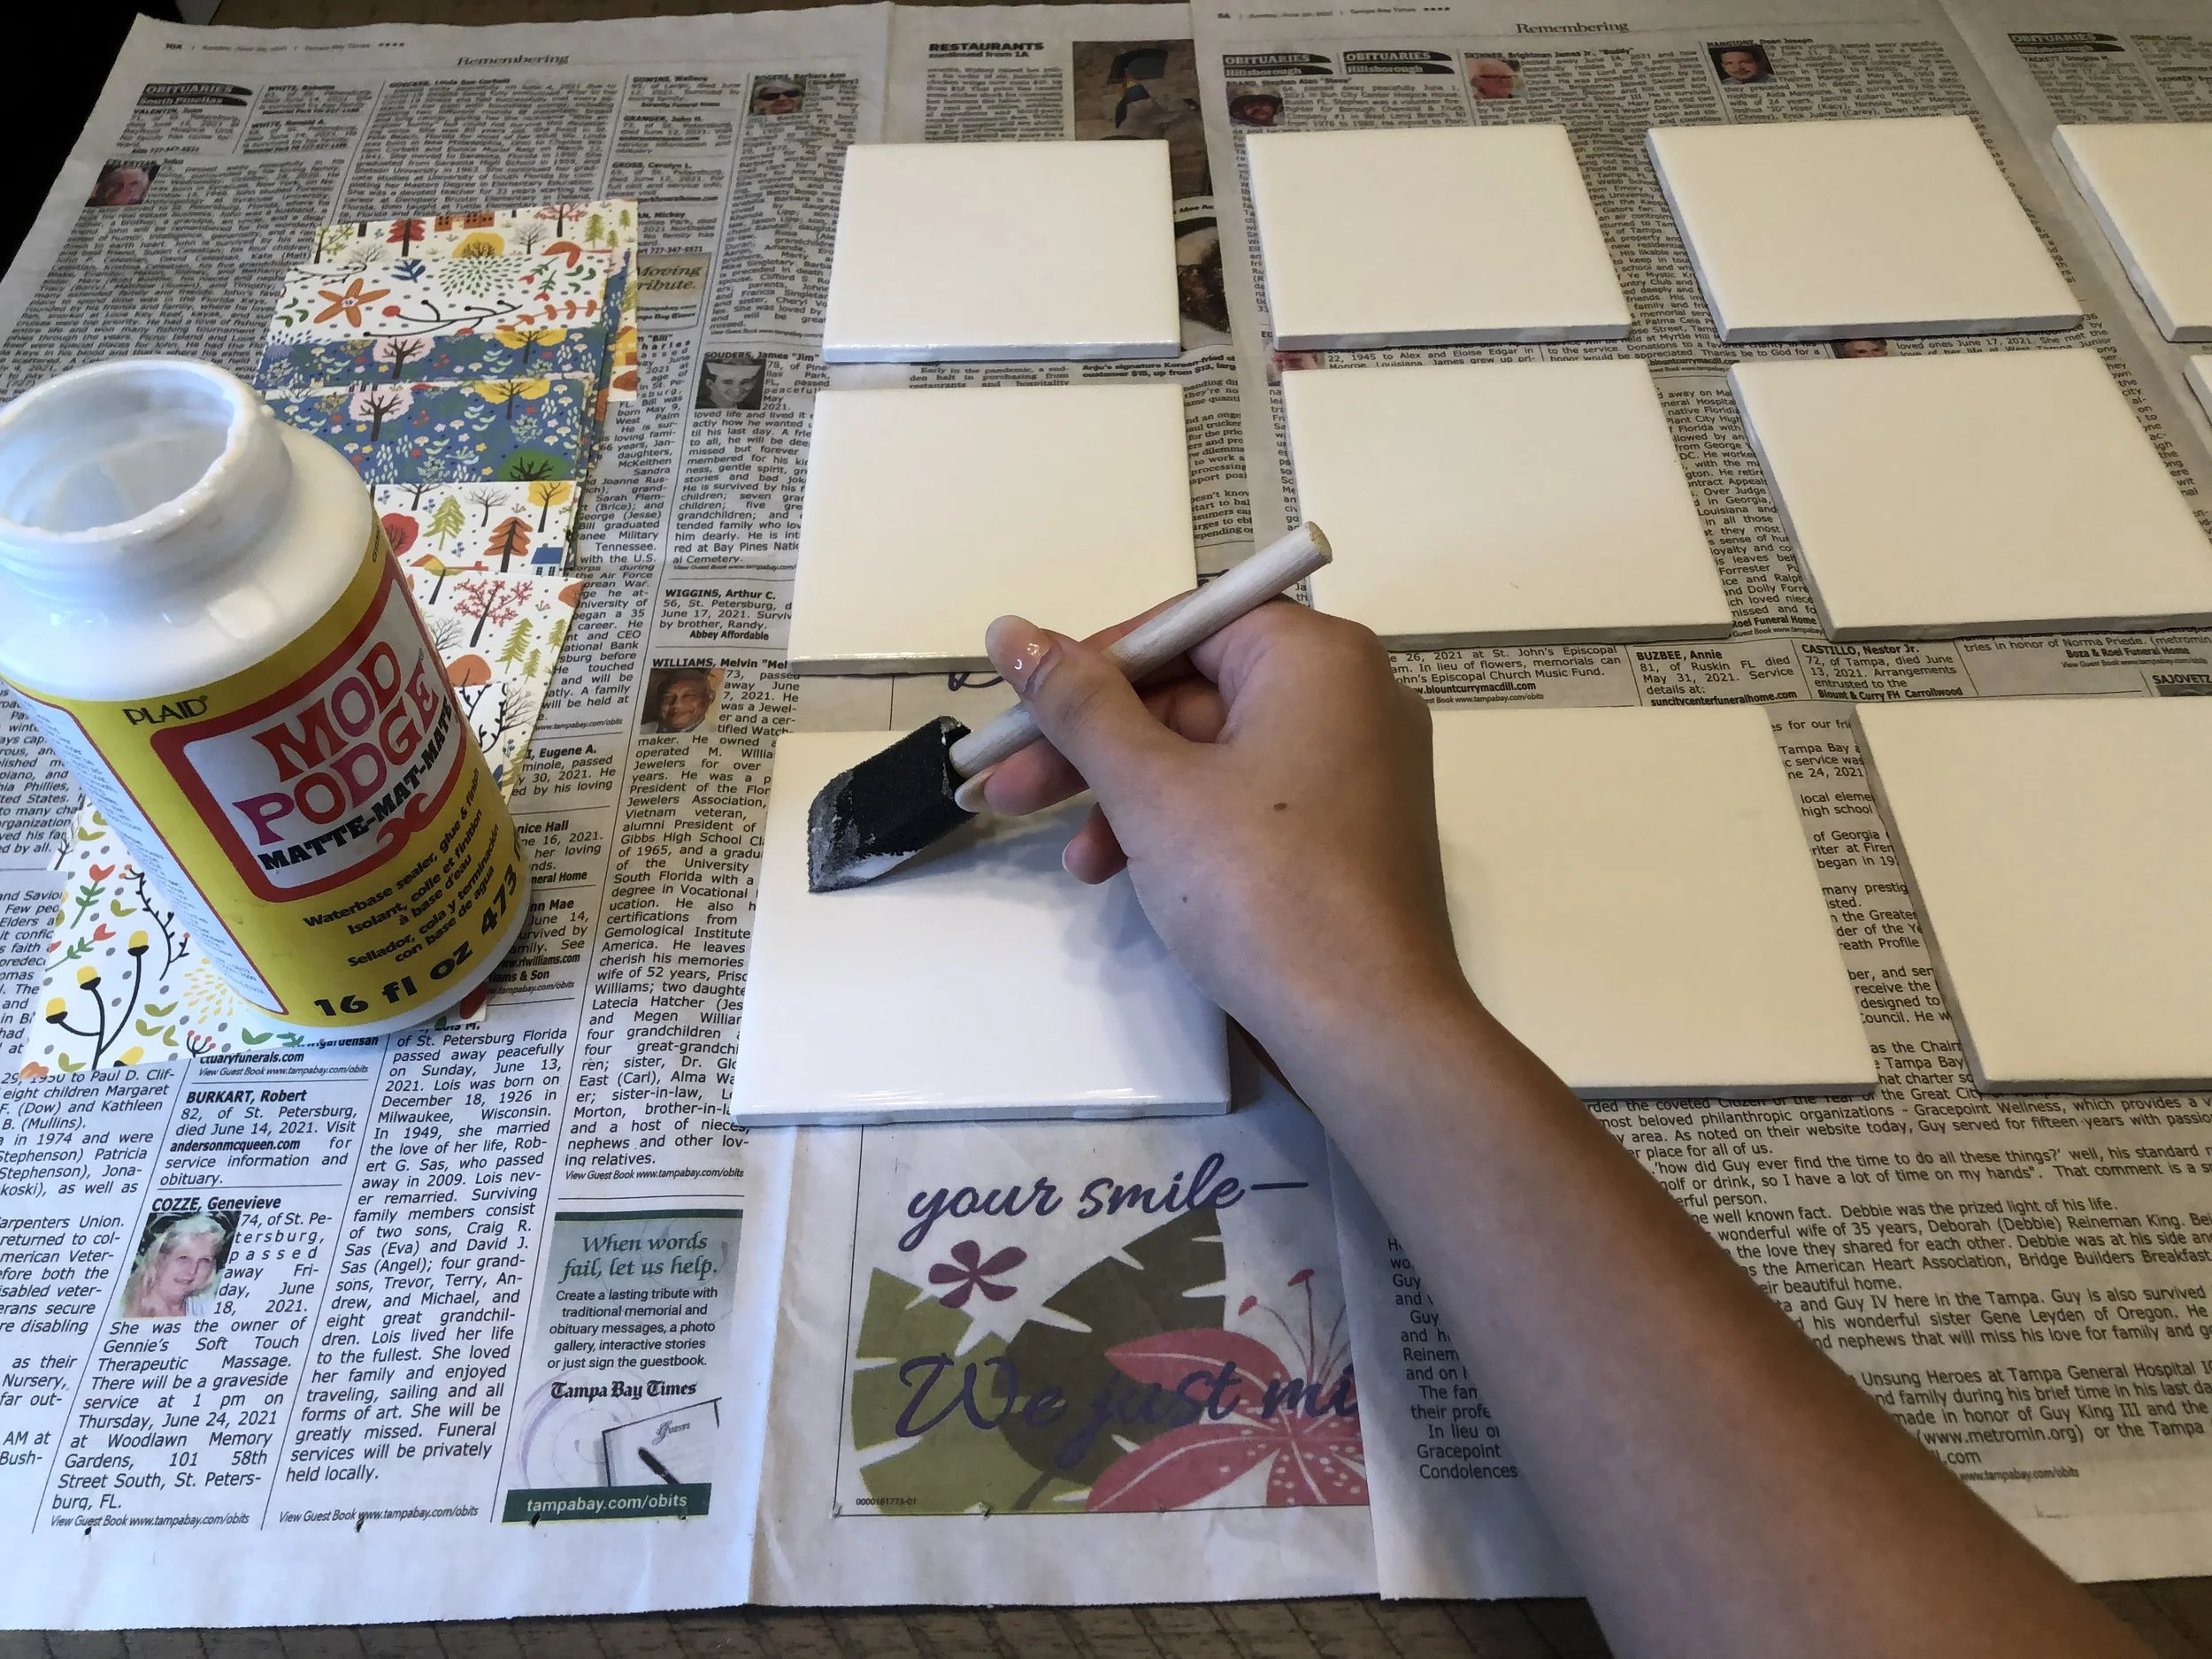
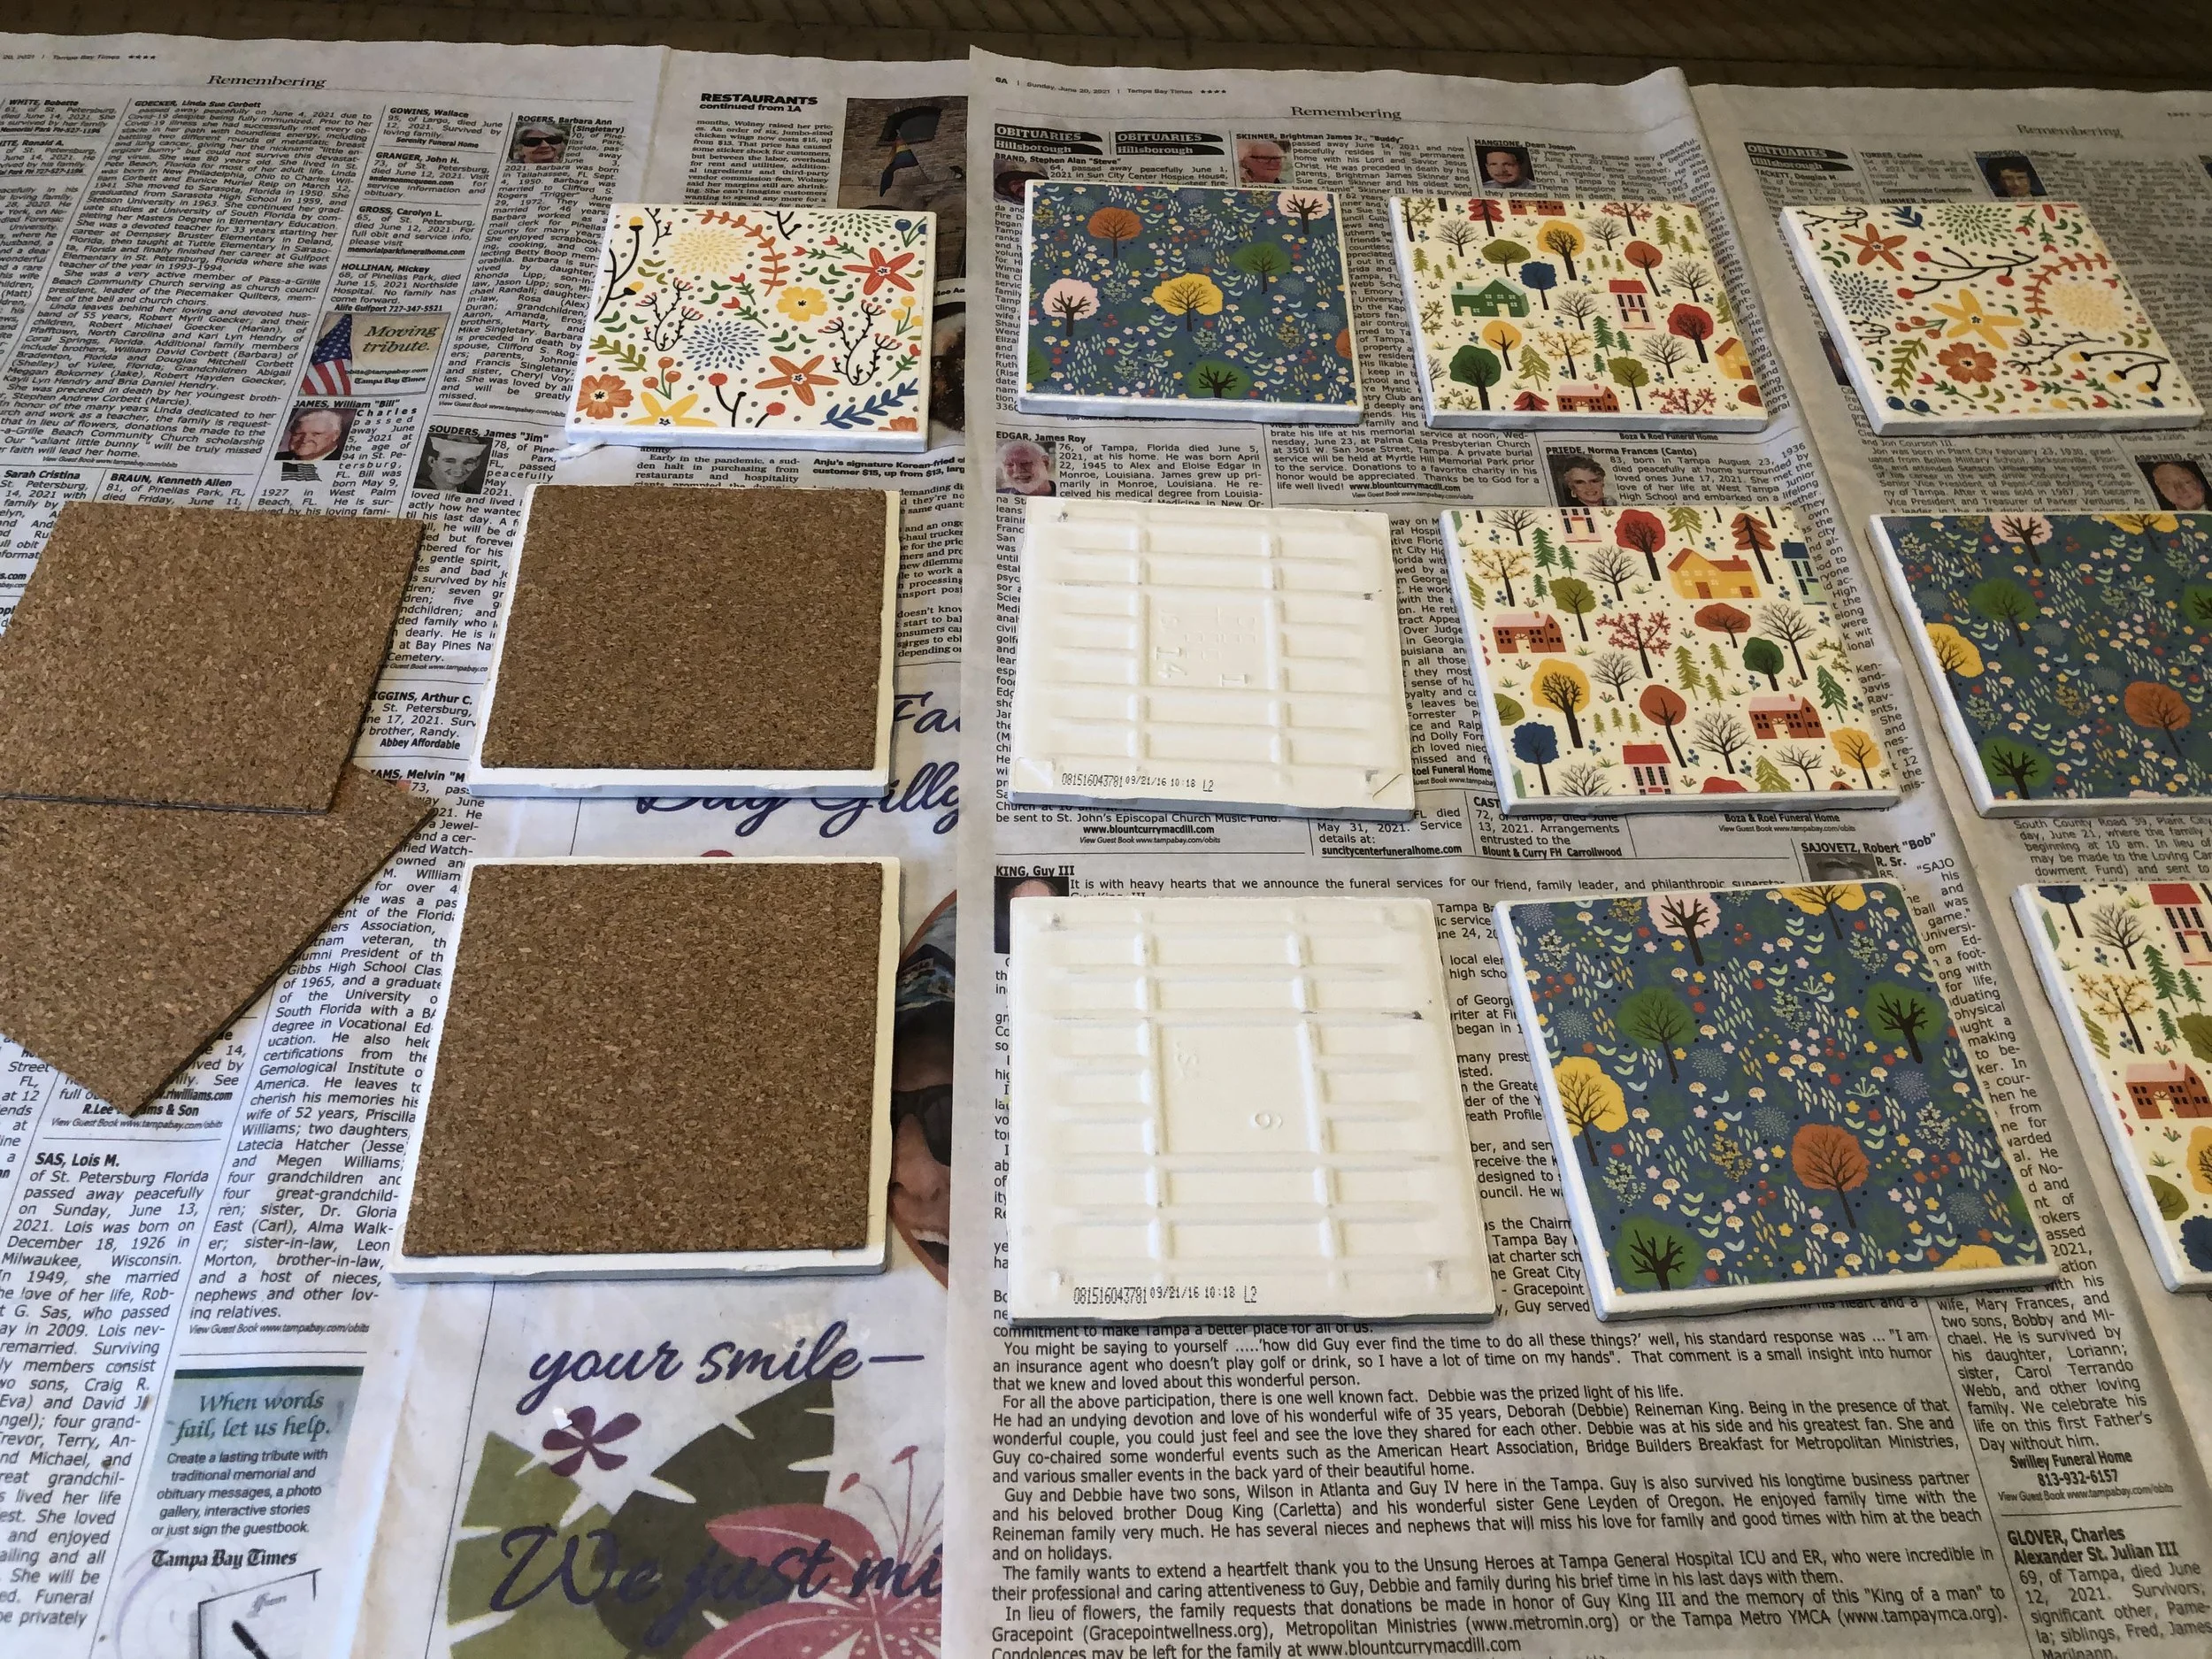
4x4 Ceramic Tiles
4x4 Cork Adhesive Squares
Foam Brush
Mod Podge
Sealant
Scissors
Ruler
Pencil
Newspaper
Scrapbook Paper

Find patterned paper you like. I got these pretty fall designs from my local Michaels.
How much paper do you need?
It depends on how many coasters you’re making. A single 12x12 sheet will give you nine coasters, making this a super affordable craft.
Alternative options: Photos, wrapping paper, scrapbook paper scraps, or even kids’ artwork all work beautifully for this project!.
4x4 Ceramic Tiles
I recommend shopping around for the best deal on ceramic tiles — stop by your local hardware stores and compare prices. If you prefer the convenience, you can also order a pack of 12 white ceramic tiles online.
4x4 Cork Adhesive Squares
You’ll need cork for the back of your coasters. The first time I ever made homemade drink coasters, I used a roll of cork and cut out 4x4 squares myself. You can do this, but there are two reasons I don’t recommend it:
Cutting cork is difficult. My cuts were rarely straight, and little pieces kept chipping off.
You’ll need hot glue. If you’re cutting your own squares, you’ll also need a way to attach them to the tile.
Using self-adhesive cork squares eliminates both of those issues. They’re incredibly easy to use — just peel and stick — and most packs come with extras. Perfect for future crafts or making more coasters for another season or holiday.
Alternative: You can also use felt pads on each corner of the tile instead. Just note that they won’t cover the entire back like cork does, so the coaster may feel a little less weighted and durable.
Mod Podge
Mod-podge is one of my must-have crafting supplies. I used a matte finish, but I’m sure the glossy option works beautifully too. To apply the mod podge, I’ve found that a foam brush works best.
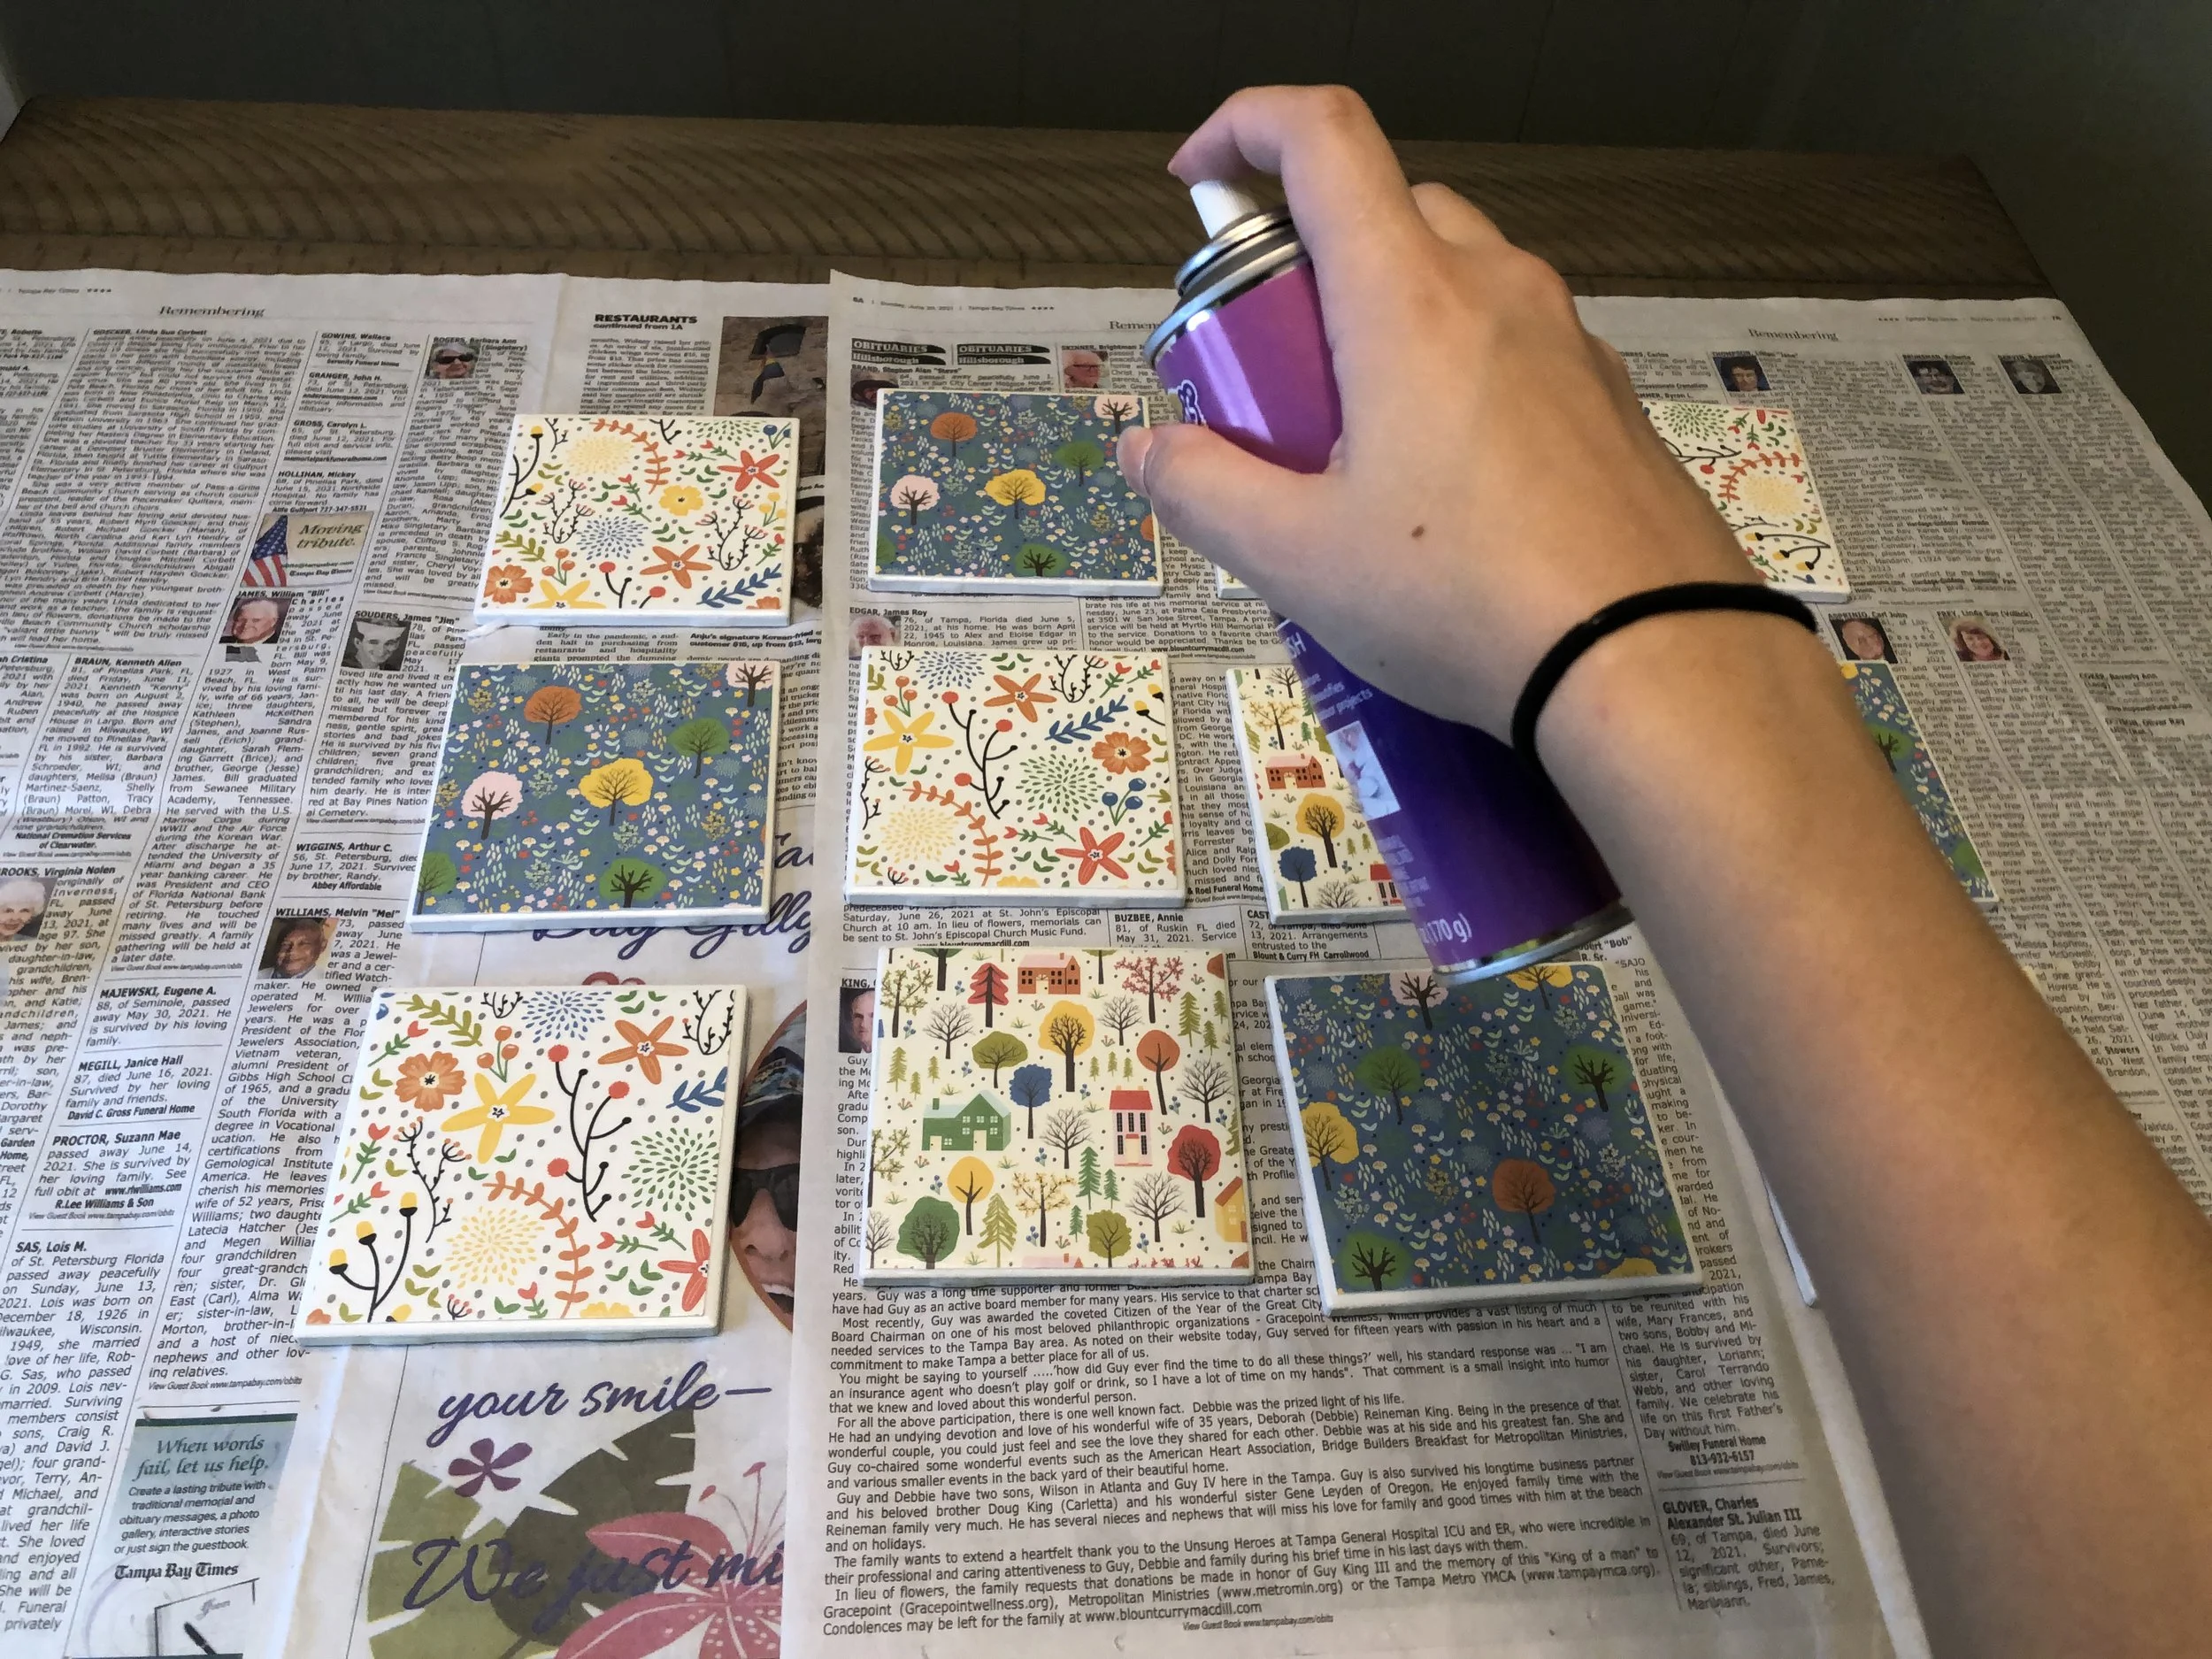
Sealant
This is the product that’s going to make the coasters water resistant and give them that smooth, shiny finish. I used Aleene’s Acrylic Spray Sealer (Matte Finish).
Scissors
You’ll need something to cut the scrapbook paper with.
Alternative: Paper cutters work great and ensure straight lines.
Newspaper
Protect the surface you’re going to be working on with some newspaper.
Instructions
Have all your materials? Make your DIY fall coasters using these 7 easy steps:
Step 1: Cut 4x4 Scrapbook Squares

Gather your pencil, scissors, and ruler. Flip your 12x12 paper and measure 4 inches on each side. Draw a small line every 4 inches and then connect the lines. Using your paper cutter or scissors, cut out these squares. You should have a total of 9 evenly cut squares.
Note: DON’T trace your tile to cut out the squares. I did this the first time I made these DIY drink coasters and was only able to get a total of 4 squares. They also turn out quite big and don’t sit well on the tile. Dividing your 12x12 paper into 4x4 squares will give you a total of 9 squares and a nice white border when they are glued onto the tile.
Step 2: Prepare Your Space
Cover the area you plan on working on with newspaper and place your tiles over it face up. The nice part about this DIY project is you can make as little as 2 coasters or as many as 12 (the process will be the same).
Step 3: Apply Mod Podge to Tiles
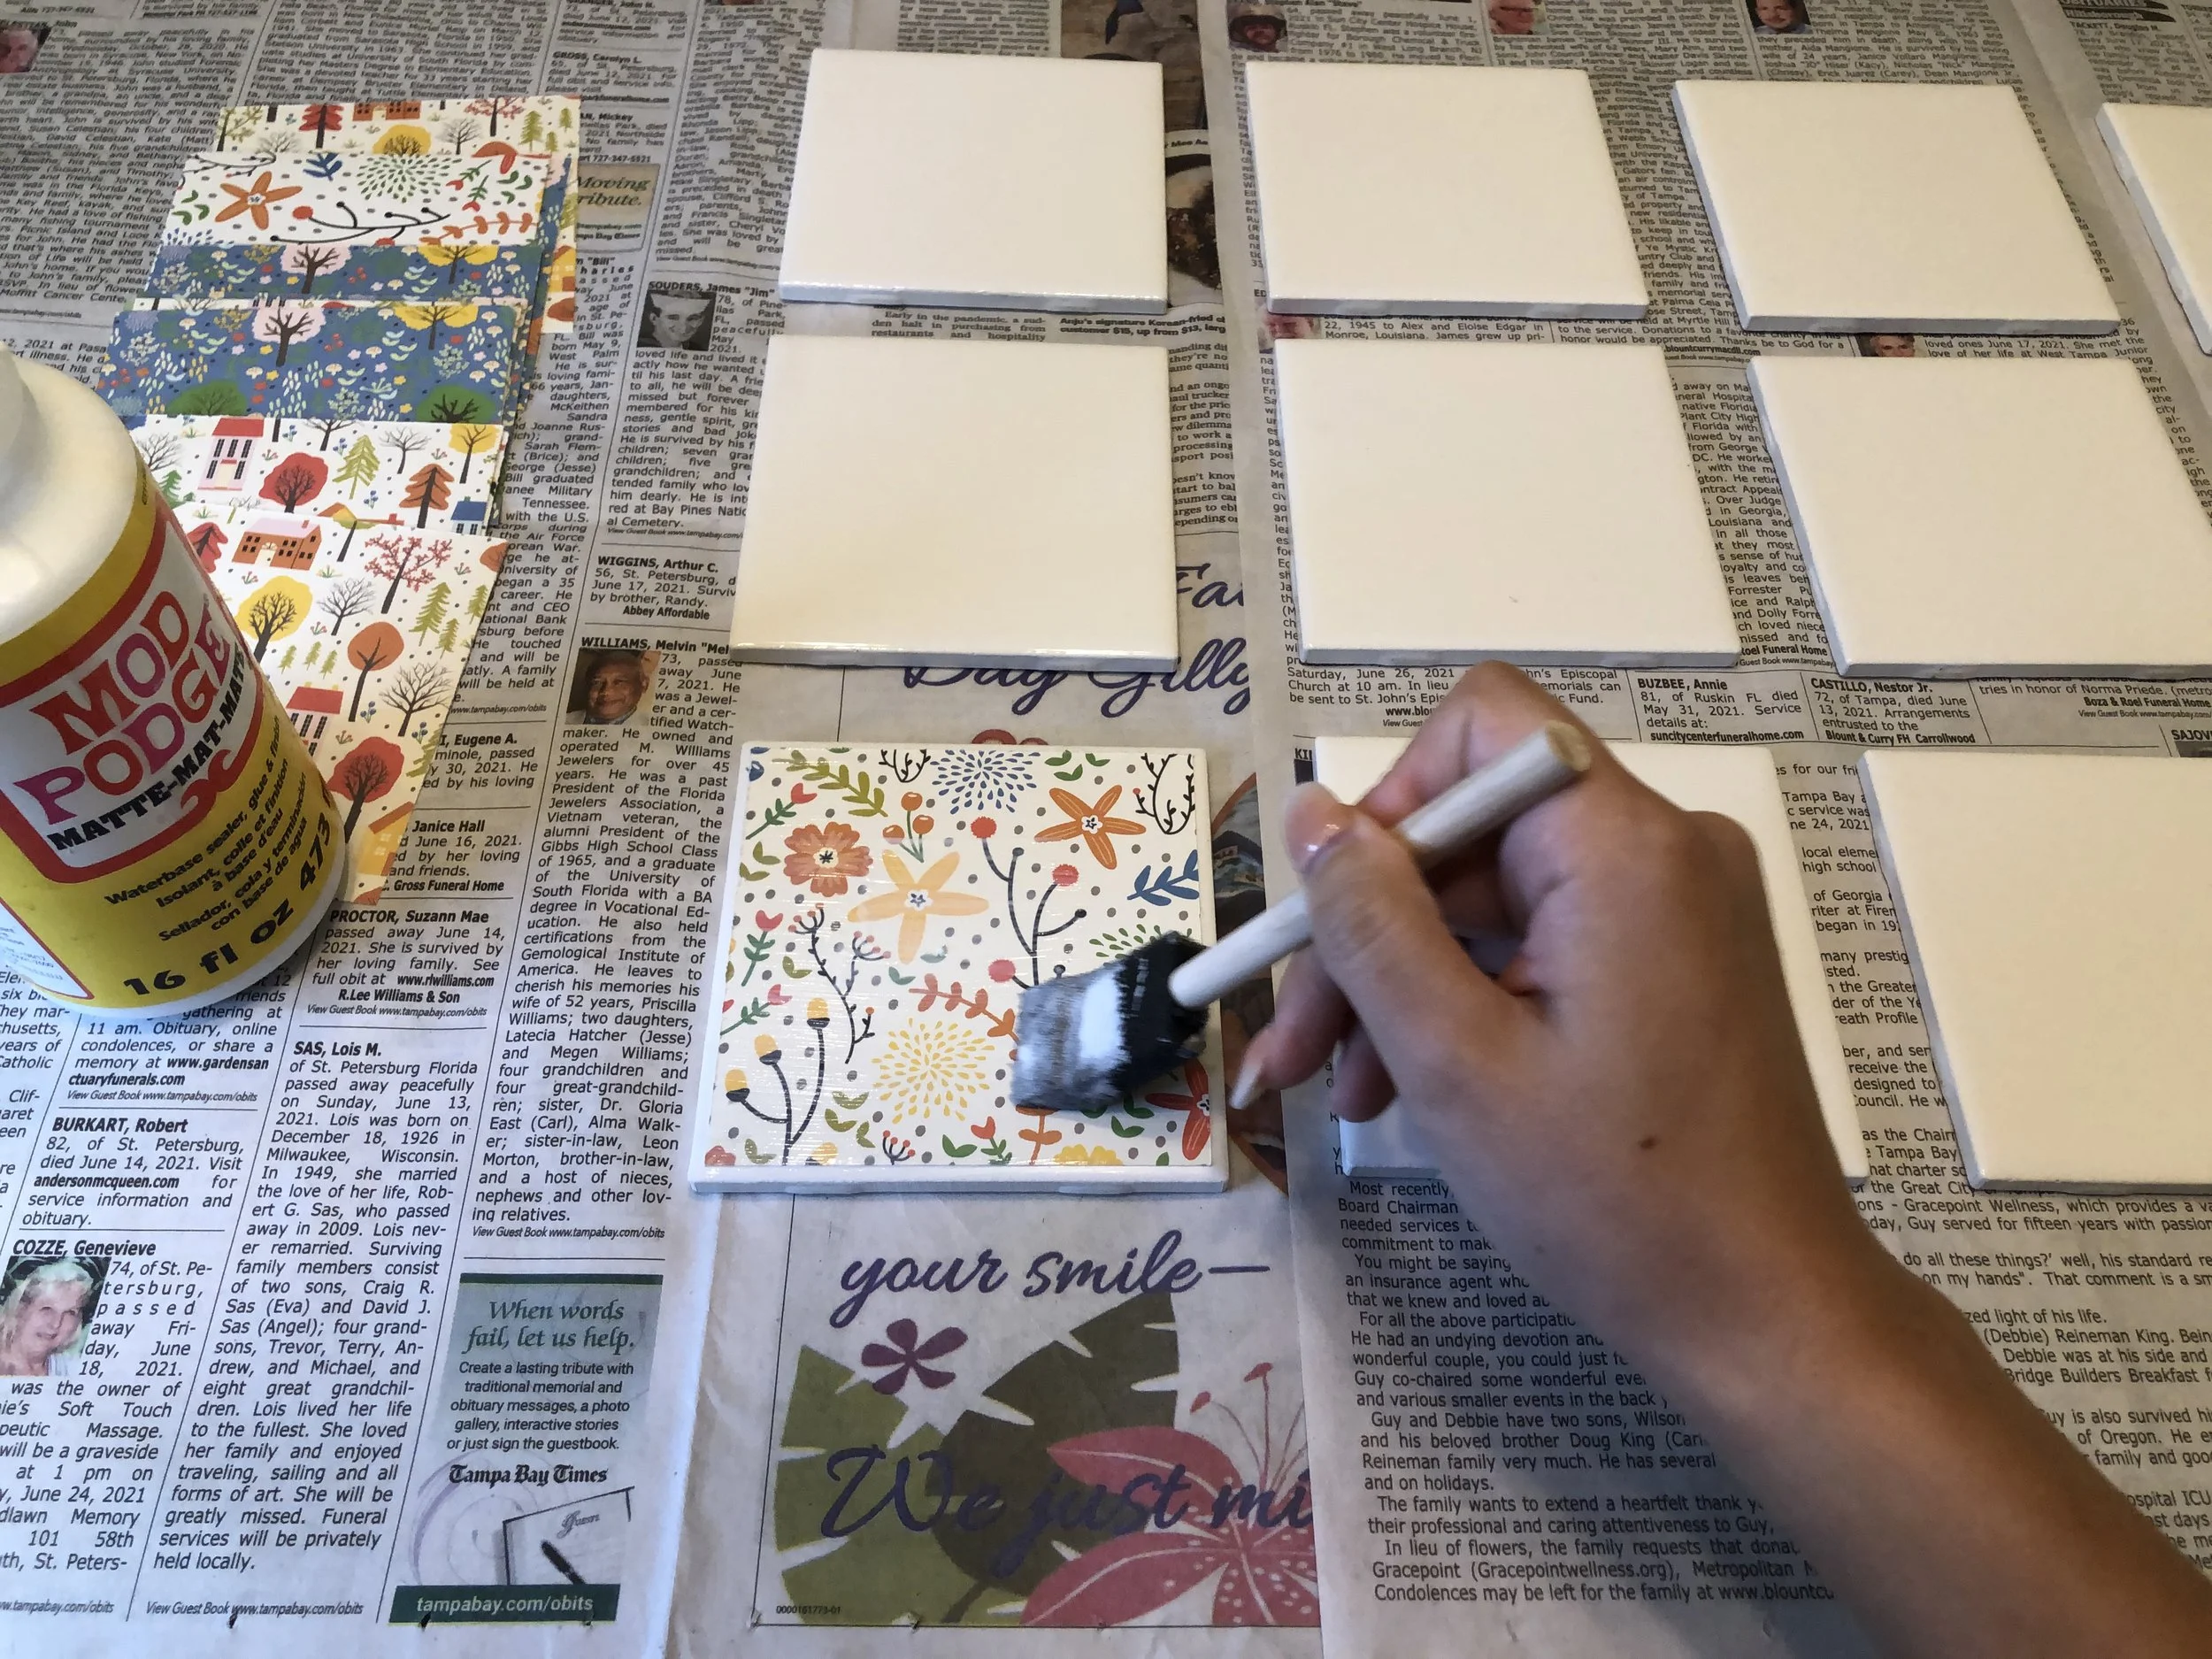
After you set the tiles on your working surface, apply some mod podge to the top of one tile using the foam roller. Spread the glue in even strokes. A thin layer is sufficient since we’ll be applying up to three layers.
Make it stand out
Step 4: Apply Scrapbook Squares
Place a 4x4 square on your tile. Center it so that it leaves a small white border all around. Press down on the corners with your fingertips and smooth out any creases found within the paper using your ruler. Then, apply a second coat of mod podge over the scrapbook paper using even strokes. Make sure to get the edges and the corners.
Step 5: Repeat & Let Dry
Repeat steps 3 & 4 to each tile and let dry for 30 minutes. Then, apply a final coat of mod podge to each tile and let them dry for an hour.
Step 6: Apply Sealant
Once the mod podge has dried, spray all tiles evenly using your matte waterproof sealant. Let it dry for 10 minutes. Make sure you spray sealant in a well-ventilated area.
Step 7: Add the Cork Adhesive
Flip your coasters and apply the cork squares. Press down on all sides and corners to ensure an even, secure application. Then, flip them back around, and you’re all done!
Make it stand out
Fall Inspired Drink Coasters | Decorating Your Home
Homemade coasters bring a unique touch to any home. They are easy to make, clean, and last forever! They also make great gifts being that they’re both stylish and functional. If you choose to make your very own drink coasters, we’d love to see the results, so please share. :)