Homemade Holiday Ornaments
Making an ornament every Christmas is a family tradition I’m so excited to start! This year, I made air-dry clay ornaments using a few simple supplies and my son’s tiny hand and footprint. I made 6 keepsakes (some for me and some for the grandparents!).
Here’s a quick guide so you can make your own this holiday season.
Watch a short how-to video here.
What You’ll Need
Air-dry clay
Acrylic paint
Paintbrushes
UV resin (or a gloss sealant like Mod Podge)
Ribbon
Straw (or anything you can use to poke a hole)
X-Acto knife (or something to trim excess clay)
Rolling pin
Everything I used is linked here.
Instructions
1. Roll the clay
Roll out the air-dry clay into an oval slightly larger than your child’s foot or hand. Keep it under ½ inch thick so it isn’t too heavy for the tree — mine were about ¼ inch thick (around the height of two stacked quarters).
2. Make the print
Gently press your child’s foot or hand into the clay, then cut away the extra clay around the impression.
3. Smooth the edges
Dip your fingers in a little water and smooth the edges. Use just enough to soften — too much water can cause cracking as it dries.
4. Add the hole + name
Use a straw to make a hole at the top for the ribbon. Don’t place it too close to the edge, or it may weaken the ornament.
Optional: add your child’s name on the back. I printed Zeke’s name with a Sharpie once the clay dried, but you can engrave it while the clay is still soft if you prefer.
5. Let it dry
Allow the imprint to air-dry completely. Dry time varies by size — my 11-month-old’s prints took about 3 days. You’ll know it’s dry when the clay feels lighter and turns a paler color.
6. Paint your design
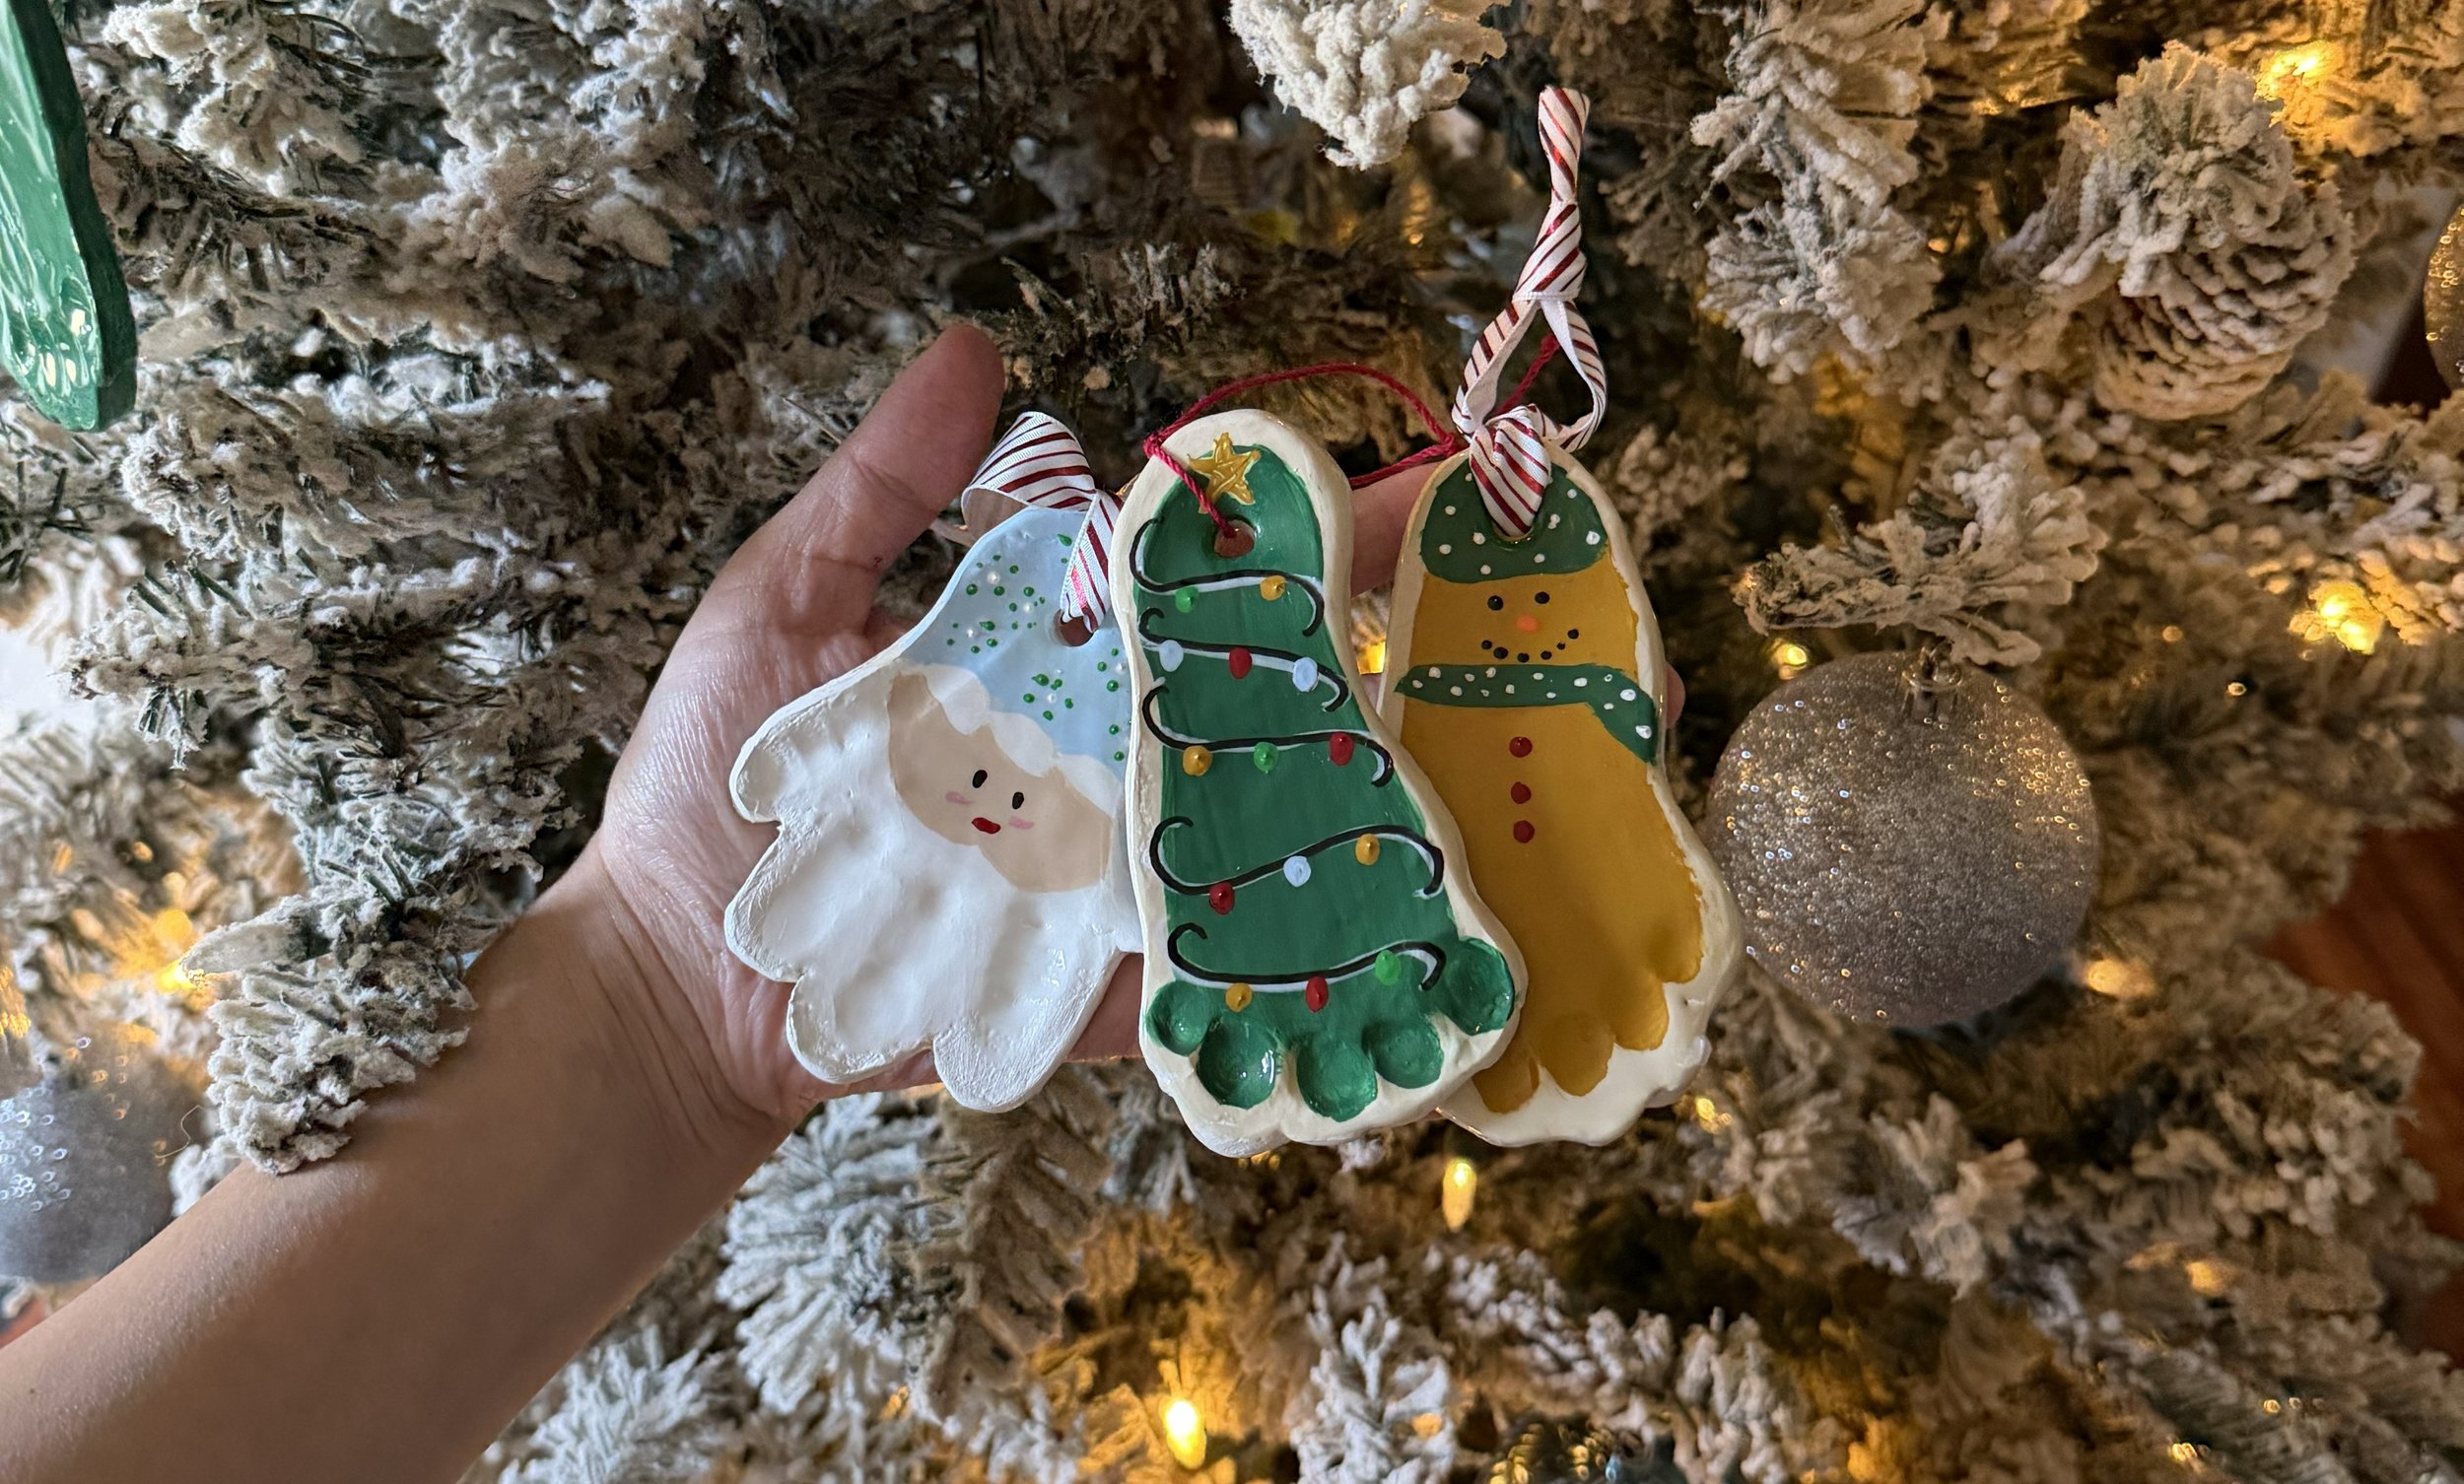
Once dry, paint your ornament! I turned handprints into Santa and footprints into a Christmas tree and snowman. I recommend two coats of paint (with drying time in between) for the best finish.
7. Seal it
For a glossy, durable finish, brush on UV resin and cure under a UV light for 1–2 minutes, making sure to cover the sides. Follow the resin’s instructions for curing and safety. If you’d rather skip resin, Mod Podge gloss sealer works great, too.
8. Add ribbon
Thread your ribbon through the hole, tie it off, and your ornament is ready to hang or gift!